To connect Futuri AudioAI™ to your station's automation system, your IT/engineering team will work with your Futuri Implementation Manager to install our Echo software on your system. You will also need to configure your WideOrbit Automation System to accept audio cuts from Futuri AudioAI™. These technical instructions will help guide the process.
TABLE OF CONTENTS
Echo Overview
There are three basic functions of Echo on WideOrbit stations:
- Now Playing Information -Song elements will be configured to export from WideOrbit to Futuri.
- Futuri AudioAI™ Integration - WideOrbit's API has built-in integration for Futuri AudioAI™, and we'll configure Echo to communicate with WideOrbit for this information.
- Music Logs - Futuri AudioAI™ updates hourly to reflect any log changes and alerts Futuri to new breaknotes in the log.
WideOrbit Information Gathering
In order for Echo to be configured to interact with WideOrbit's API, we will need the following information:
- Name of the WideOrbit central server (either an IP or a name)
- Name of the station on that server (case-sensitive, typically WXYZ-FM or something similar)
You can provide that information by filling out this form.
Echo can be installed directly on the central server or another PC that runs 24/7, as long as it is connected to both the CS and the Internet.
Note: Microsoft .NET 4.0 or higher is required for Echo. If you're running Windows 7 or higher, you should be all set, but If needed, you can download .NET. When .NET is confirmed to be installed, run Echo.exe and navigate to File > Boot on Startup so that Echo will start with the PC.
You may want to check your WideOrbit category definitions in your admin to ensure that ONLY song categories are configured as "music". It is also helpful to provide these categories to your Implementation Manager.
WideOrbit Rule Configuration
- In Windows Explorer, add a folder for storing Futuri AudioAI™ files. Make note of the folder's directory location, as you will need to refer to it later.
- In the WideOrbit Automation System, open Audio Finder and navigate to Configuration.

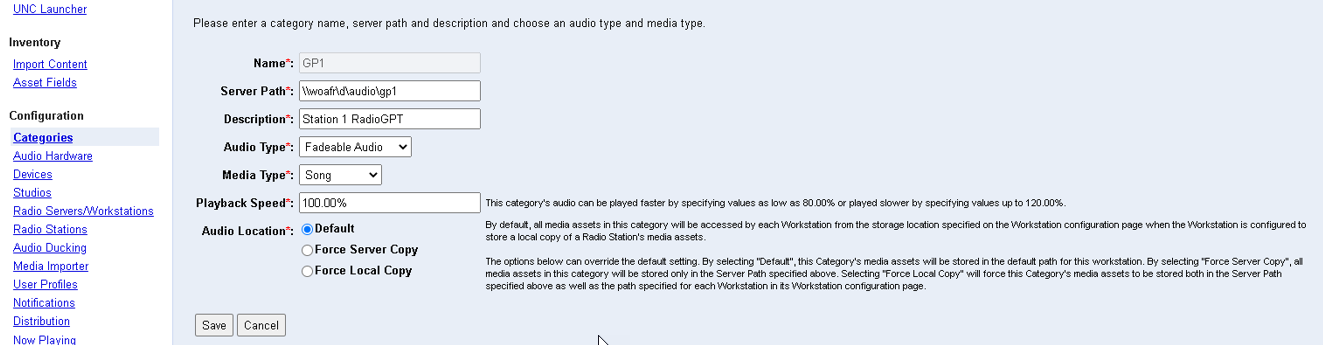
- Add a separate Category for each station that will use Futuri AudioAI™.
NOTE: Each category should have a name that correlates with the Wide Orbit station number with which it will be used.
-
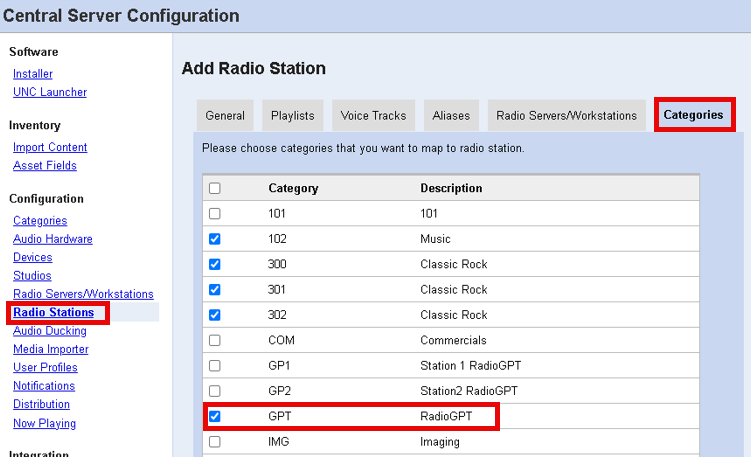
Next, go to Radio Stations in the left-hand menu. Click on a station name and select the Categories tab. Check the box for the category you just created for that station. Repeat this step for any other stations installing Futuri AudioAI™.
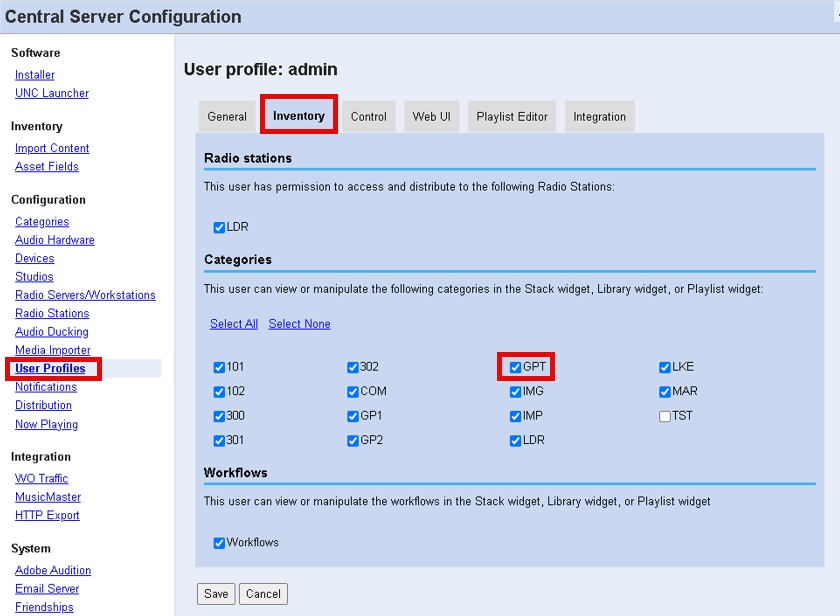
- After that, go to User Profiles. Click on a user that needs to access Futuri AudioAI™ settings and check the appropriate category or categories on the Inventory tab. Repeat this step for any other users accessing Futuri AudioAI™ settings.
- Navigate to Media Importer in the left-hand menu. Scroll down and click Add Rule.
- Create a rule to import Futuri AudioAI™ audio cuts:
- Navigate to the Media Importer section in the WideOrbit Automation System.
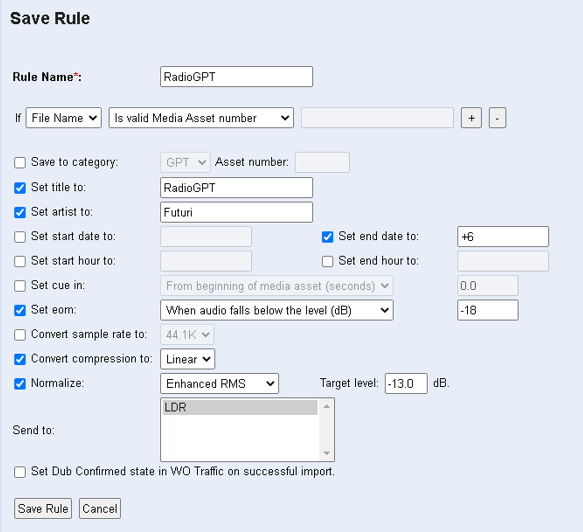
- Select Add Rule and enter the rule name for importing Futuri AudioAI™ audio cuts.
- Insert the “If” line to: If [filename] [is valid Media Asset Number].
- In the Set Title To section, enter "Futuri AudioAI™".
- In the Set Artist To section, enter "Futuri".
- In the Set End Date To section, enter "+6" to prevent the same cut from playing again next week.
- Checking Set eomis optional depending on your station's preferences:
- Choose "From beginning of a media asset (seconds)" to import as a Vp.

- Choose "When audio falls below the level (dB)" to import as a dB.

- Choose "From beginning of a media asset (seconds)" to import as a Vp.
- In the Convert Compression To section, select [Linear].
- In the Normalize [Average Peak] section, enter the station standard.
- In the Send To section, select the station where the audio cuts will be imported.
- Click on Save Rule to save the changes.
- Scroll up and select Add Directory.
- In the Path field, enter the directory where you wish Echo to save the Futuri AudioAI™ files (e.g. \audio\import\gpt). This should be the folder you created in step 1.
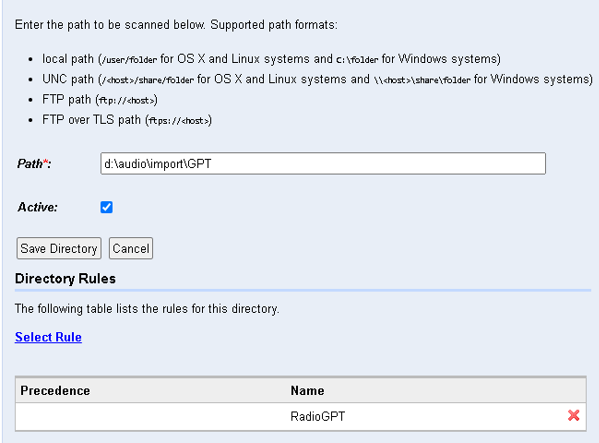
- Click Select Rule and check the box next to the Futuri AudioAI™ rule you just created.
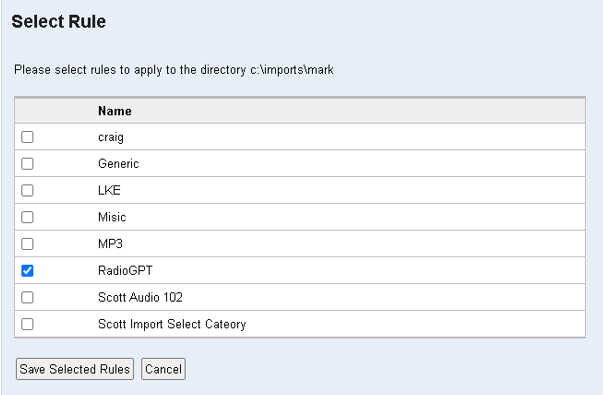
- Click Save Selected Rule.
- Double-check that Active has a checkmark selected.
Echo Installation
After receiving the information above, your Implementation Manager will provide you with a pre-configured Echo file and settings files (named station.xml and wideorbit.xml). Do not run Echo.exe without first configuring the settings files.
Once you have the preconfigured files, you will follow these steps to install Echo:
- Download the provided zip file to the computer you have selected to run Echo. This is typically the Central Server but it can be any PC that runs 24/7, as long as it is connected to both the CS and the internet.
- Create the folder C:\Echo\XXXX
- Extract the contents of the downloaded Echo.zip file to the same folder.
- In the newly extracted folder, place the station.xml and wideorbit.xml files. These settings must be saved in the same folder as Echo.exe.
- Save wideorbit.xml and repeat the steps as needed for other stations.
NOTE: If you are setting up multiple stations, each should have a folder in C:\Echo with its own copies of Echo and settings files inside.
Testing
Once the steps above have been completed and Echo is running, ensure that there are no noticeable errors on Echo's screen.
Then, make sure Echo receives the next song played in WideOrbit.
To test the music log push process, you can navigate in Echo to WideOrbit > Send Schedule to LDR > Today.
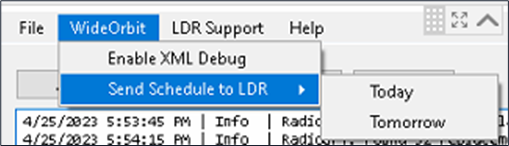
It is normal to see some benign errors on the screen after that, and your Implementation Manager can confirm whether the log was successfully received.